Starting a blog
2024-12-06
Table of Contents
- Setting Up
- Create Folder for Posts
- Install Hugo
- Initialize Git Repository
- Download a Hugo Theme
- Example Theme Configuration
- Test the Hugo Site Locally
- Add Posts
- Sync Obsidian Notes with Hugo Posts
- Add Metadata for New Posts
- Add Images to Hugo
- Run the Python Script
- Upload the Code to GitHub
- Step 1: Create a New Repository
- Step 2: Push Your Code to GitHub
- Deployment
- Automation Script
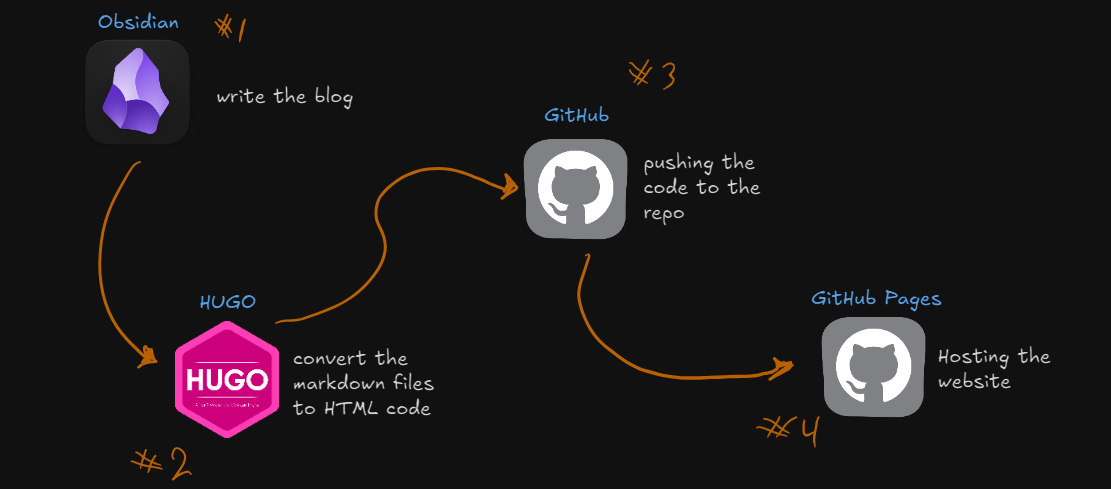
This image illustrates the workflow of this blog.
Setting Up
Before starting, ensure that you have Git, Go and Python installed on your system.
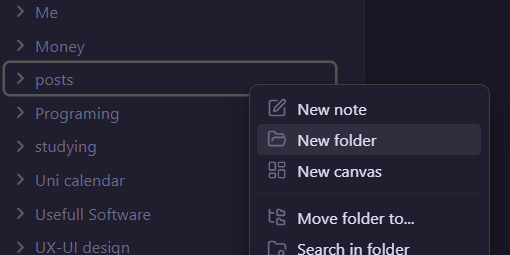
Create Folder for Posts
First, create a folder in your Obsidian vault named posts.
Install Hugo
Next, install Hugo and add it to your environment variables.
Link: https://gohugo.io/installation/
## Verify Hugo works
hugo version

## Create a new site
hugo new site websitename
cd websitename
Initialize Git Repository
After creating your Hugo site, initialize a Git repository:
git initDownload a Hugo Theme
Go to Hugo Themes and download a theme of your choice. For this example, we’ll use the theme Hugo Ficurinia from GitLab.
Use the following command to add the Hugo theme to your site:
git submodule add -f [the repo link of the theme] themes/[name of the theme]For me I did this:
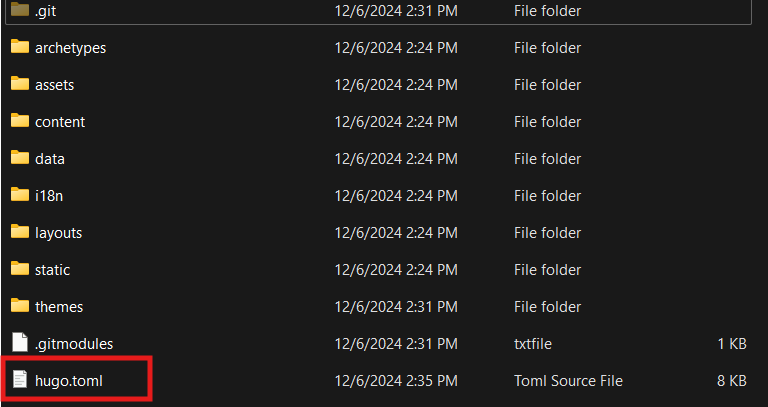
git submodule add -f https://gitlab.com/gabmus/hugo-ficurinia.git themes/hugo-ficuriniaExample Theme Configuration
Most themes come with an example configuration, which is typically the best way to get started. For the hugo-ficurinia theme:
baseURL = "/"
theme = "hugo-ficurinia"
title = "Abdullah Salameh's Blog"
languageCode = "en"
defaultContentLanguage = "en"
# this will be included in the footer after the current year the site is last
# built, followed by the (c) symbol
# you can use markdown inside this field
paginate = 5  # number of articles per page in the index
summaryLength = 50  # number of words for article summaries
[params]
    author = "Abdullah Salameh"
    description = "A description for my website"  # this will be added as metadata
    posts = "posts"  # content directory where to find home page posts; default searches in "posts" and "post"
    showPostsLink = true  # show or hide the link to the simple post list
    extraContentDirs = []  # other content directories to render similarly to the home page
    showcaseDir = "showcase"  # create a content directory that shows a special showcase section in the home page
    # shows a specified single page as a home page, instead of the traditional articles list
    # requires setting `homeSinglePage`
    # goes well with extraContentDirs
    showSinglePageAsHome = false
    homeSinglePage = "/home"
    # It's best to put these icons in the "static" folder of your site
    logo = "/logo.svg"
    favicon = "/favicon.png"  # 32x32
    faviconIco = "/favicon.ico"  # 32x32
    appletouch = "/apple-touch-icon.png"  # 180x180
    svgicon = "/logo.svg"
    icon512 = "/icon512.png"  # 512x512 png image
    logoRightOfTitle = false  # positions the logo to the right of the title; default: false
    showTags = true  # show the Tags menu item; default true
    showRss = false  # show the link for the RSS feed; default true
    imageInArticlePreview = true  # show images in article preview; default false
    fitImageInArticlePreview = false  # make article preview images fit the article preview instead of getting cropped
    articleSummary = true  # show a summary in article preview; default true

    fontFamily = "JetBrains Mono"  # changes the font, default "JetBrains Mono"
    titleFontFamily = "JetBrains Mono"  # font used for titles and headings
    monospaceFontFamily = "JetBrains Mono"  # changes the monospace font for code, default "JetBrains Mono"
    # multipliers applied to font sizes, useful for custom fonts that may be too big or too small
    titleFontSizeMultiplier = 1.0
    mainFontSizeMultiplier = 1.0
    monoFontSizeMultiplier = 1.0
    contentWidth = "1000px"  # maximum width of the site content, css syntax
    paperCards = true  # enable paper card style; default false
    buttonTags = false  # enable button tag style; default false
    tagsInArticlePreview = true  # enable tags list in the article preview card
    gridView = true  # show post list as a grid. goes well with paperCards
    bigArticleTitle = false  # makes the title in the single article view bigger
    navtype = "standard"  # changes the style of the pagination, available styles are: "standard", "circles"
    enableShadow = false  # shows a shadow around some elements
    menuStyle = "buttons"  # changes the style of the main site navigation menu, available styles are: "standard", "buttons"
    inputStyle = "standard" # changes the style of inputs (like the searchbar), available styles are: "standard", "buttons"
    enableSearch = true  # enable search page
    searchbarEverywhere = true  # if the searchbar should be shown in every page; requires enableSearch
    searchMenuLink = false  # add a search link to the navigation menu; requires enableSearch
    mobileHamburgerNav = false  # alternative hamburger menu layout for the main nav menu when screen is small
    enableFeatured = false  # enable a particular view for articles marked as featured (featured: true in the article frontmatter)
    underlineTitleLinks = false  # show an underline also for links that are titles
    # enable comments support with commento using the script from your server
    commento = "https://example.com/js/commento.js"
    # enable comments support with cactus comments (cactus.chat)
    cactusCommentsSiteName = "example.com"
    cactusCommentsServerName = "cactus.chat"
    cactusCommentsHomeserver = "https://matrix.cactus.chat:8448"
    # enable analytics using Plausible
    plausibleScriptUrl = "https://something.com/..."
    plausibleDomain = "example.com"
    # enable analytics using Umami
    umamiScriptUrl = "https://something.com/..."
    umamiWebsiteId = "example-tracking-code"
    enableShareOnFediverse = false  # enable a button at the end of an article to share it on the fediverse
    tocBeforeImage = false  # show the table of contents before the main article image; default false
    # WARNING: deprecated! Use [[menu.icons]] instead, look below
    # links = [
    #     ["GitLab", "https://gitlab.com/gabmus"],
    #     ["GNOME", "https://gitlab.gnome.org/gabmus"],
    #     ["YouTube", "https://youtube.com/TechPillsNet"]
    # ]
    # you can customize all of the colors in this theme
    # Colors are defined in data/colors.yml
    # alternative sidebar layout
    enableSidebarLayout = false
    tocInSidebar = false  # if the sidebar is enbabled, show the TOC in the sidebar
    # redirect to baseURL if current URL host doesn't match
    # useful if deploying in gitlab pages with custom domain and don't want
    # the username.gitlab.io/website url to persist
    # this requires you to set baseURL (see above)
    forceRedirect = false
    infiniteScrolling = false  # activates infinite scrolling instead of regular pagination
                               # NOTE: you need to enable JSON output for this to work!
                               #       look at the [outputs] section below
    enableFooterColumns = false  # activates footer columns, as described below
    enableJumbotron = false  # enables jumbotron, as described below
    # related articles will be selected randomly based on tags and shown at
    # the bottom of the article, after the comments
    enableRelatedArticles = true
    relatedArticlesNum = 2  # how many related articles to show
    randomRelated = false  # sorts related articles in random order (randomized at built time)
[menu]
    # these links will be added to the main navigation menu, sorted by weight
    # other elements in this menu are added automatically from the "pages" folder
    # the folder it will look into can be customized with the pages variable
    # in params above
    [[menu.main]]
        identifier = "about"
        name = "About"
        url = "/about/"
        weight = 10
    # these links (menu.icons) will be added as icon links below the main nav
    [[menu.icons]]
        identifier = "github"
        name = "Github"
        url = "https://github.com/abda-s"
        weight = 10
    [[menu.icons]]
        identifier = "linkedin"
        name = "LinkedIn"
        url = "https://www.linkedin.com/in/abdullah-salameh/"
        weight = 20
# this section is necessary if you want infinite scrolling
# it allows to output the article list as paged JSON so that "pages" can be retrieved via javascript
[outputs]
    home = ["HTML", "JSON"]
you can use the previous configuration in your hugo.toml file:
Test the Hugo Site Locally
Run the Hugo server to test if everything is set up correctly:
hugo server -t [themename]It's working but there isn't any posts 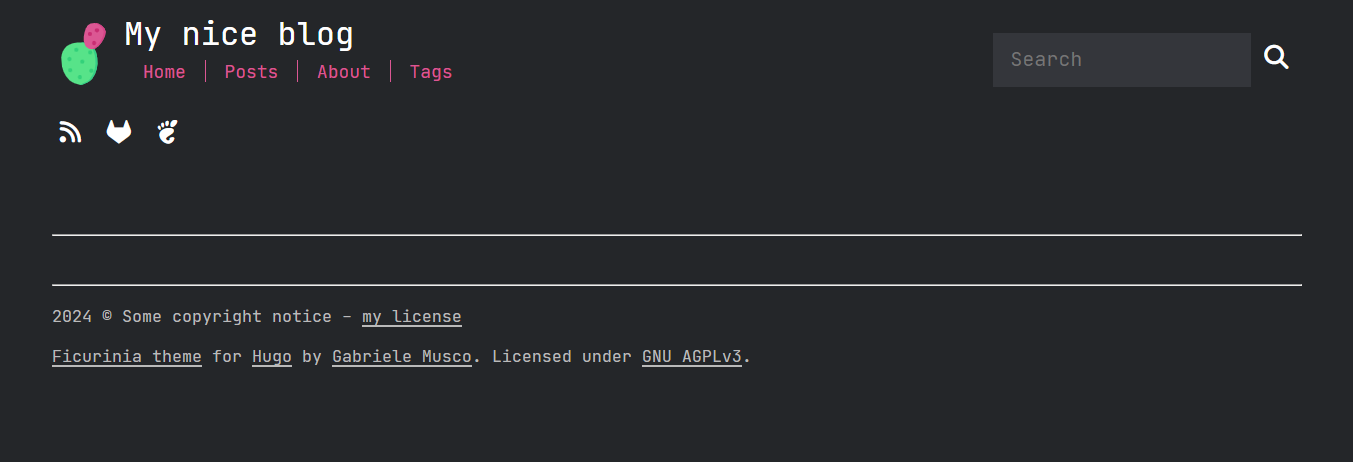
Add Posts
If everything is working but you don’t see any posts, create a posts folder inside the content directory:
cd content
mkdir posts
Sync Obsidian Notes with Hugo Posts
To sync your Obsidian notes with the Hugo posts folder, use the robocopy command:
robocopy [sourcepath] [destination] /mir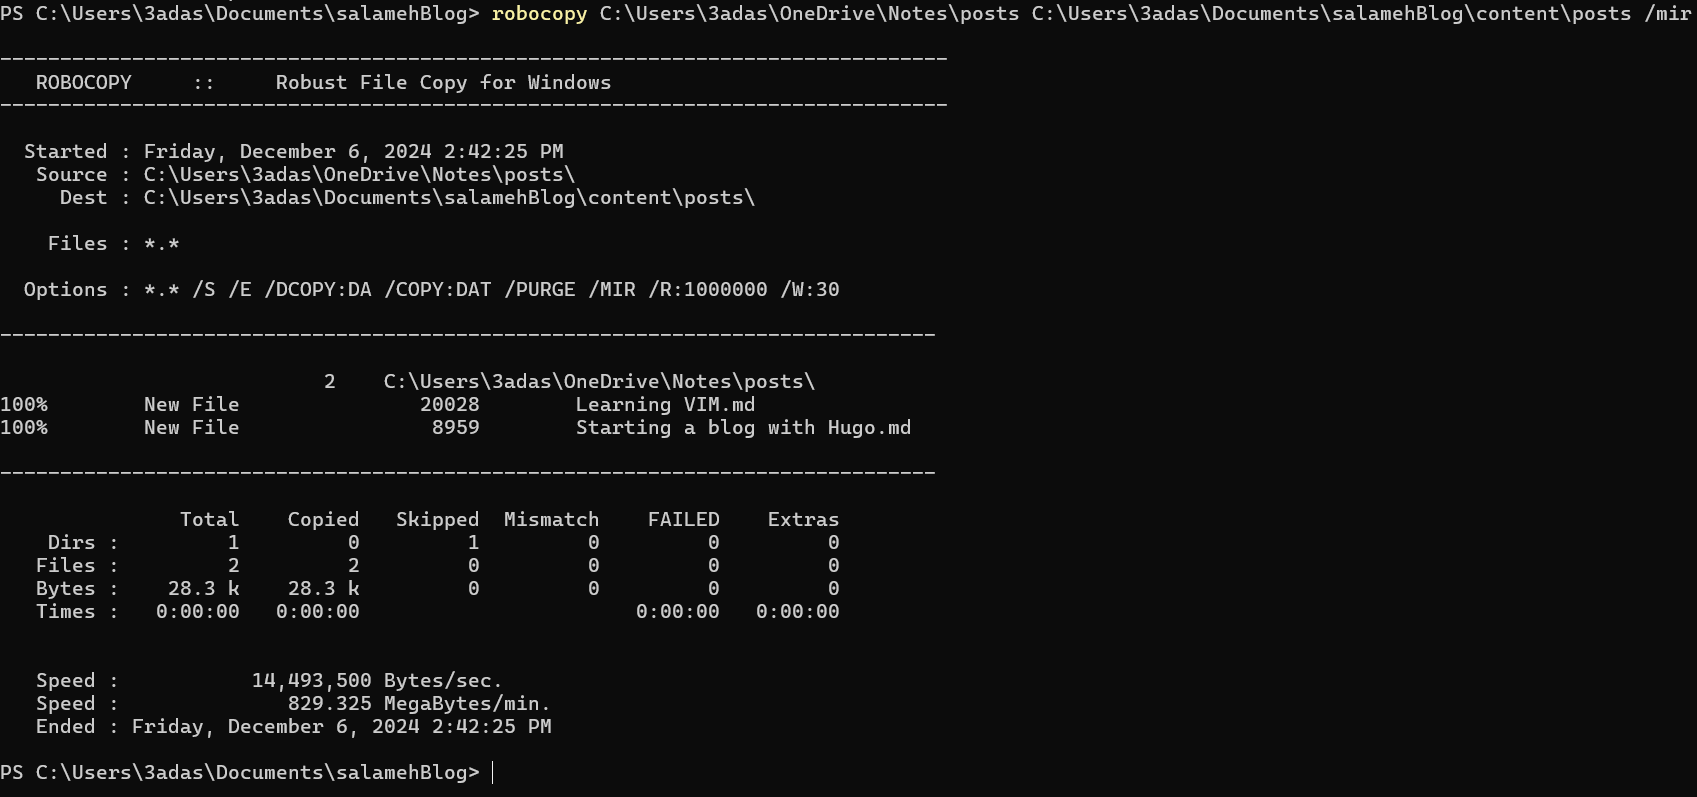
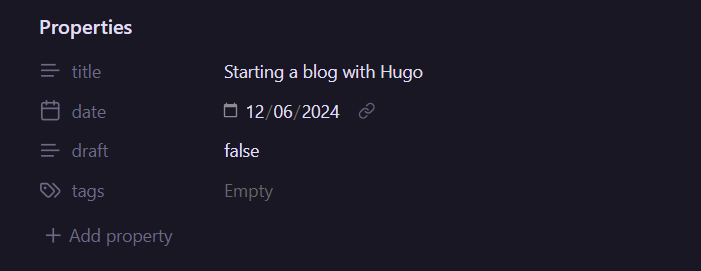
Add Metadata for New Posts
When starting a new post, make sure to add the following metadata at the top of your markdown file:
---
title: blogtitle
date: 2024-11-06
draft: false
tags:
  - tag1
  - tag2
---
Add Images to Hugo
When you add images to your Obsidian notes, they won’t appear in the Hugo site because the image source is only in Obsidian. To fix this, use the following Python script to copy the images to the Hugo static folder.
import os
import re
import shutil
# Paths (using raw strings to handle Windows backslashes correctly)
posts_dir = r"C:\Users\3adas\Documents\salamehBlog\content\posts"
attachments_dir = r"C:\Users\3adas\OneDrive\Notes\files"
static_images_dir = r"C:\Users\3adas\Documents\salamehBlog\static\images"
# Step 1: Process each markdown file in the posts directory
for filename in os.listdir(posts_dir):
if filename.endswith(".md"):
filepath = os.path.join(posts_dir, filename)
with open(filepath, "r", encoding="utf-8") as file:
content = file.read()
# Step 2: Find all image links in the format ![[image.extension]]
images = re.findall(r'\[\[([^]]+\.(png|jpg|jpeg|gif|bmp|webp|svg))\]\]', content, re.IGNORECASE)
# Step 3: Replace image links and ensure URLs are correctly formatted
for image, _ in images: # `_` is unused, it contains the extension from the regex group
# Prepare the Markdown-compatible link with %20 replacing spaces
markdown_image = f"})"
content = content.replace(f"![[{image}]]", markdown_image)
# Step 4: Copy the image to the Hugo static/images directory if it exists
image_source = os.path.join(attachments_dir, image)
if os.path.exists(image_source):
shutil.copy(image_source, static_images_dir)
# Step 5: Write the updated content back to the markdown file
with open(filepath, "w", encoding="utf-8") as file:
file.write(content)
print("Markdown files processed and images copied successfully.")
Run the Python Script
Save the above Python script as images.py in the root folder of your Hugo site. Run the script using:
python images.pyUpload the Code to GitHub
To upload your Hugo site to GitHub, follow these steps:
Step 1: Create a New Repository
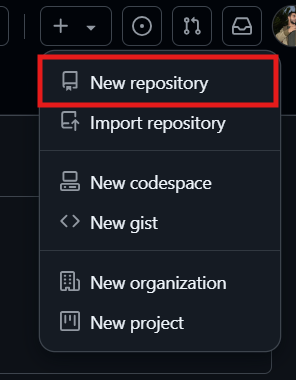
Click the plus icon in GitHub.
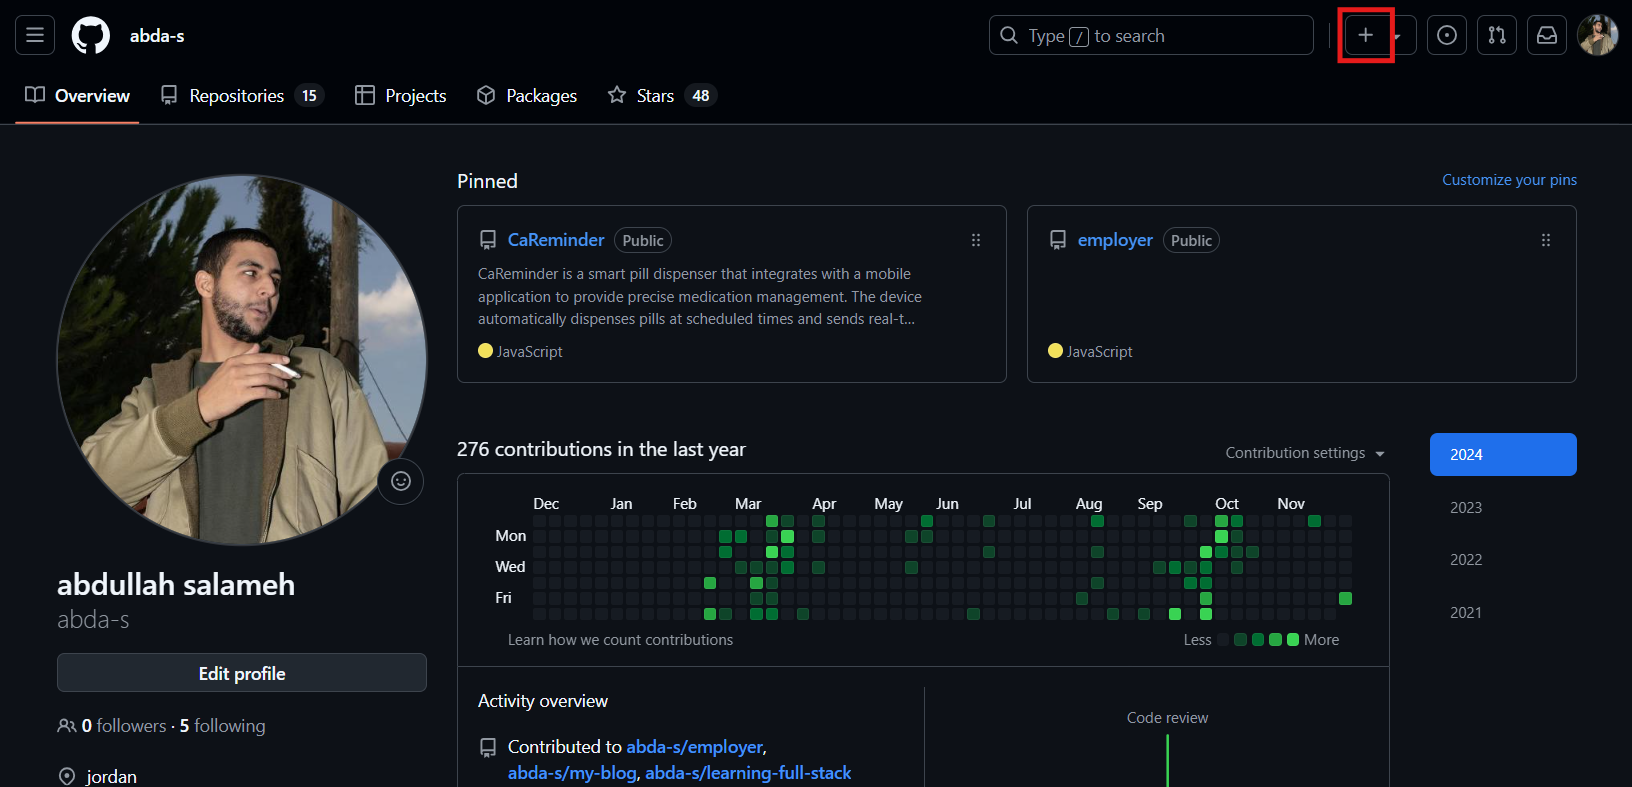
Select New repository from the dropdown menu.
Name your repository. For example, you could use
salamehBlog, Set the repository to Public.
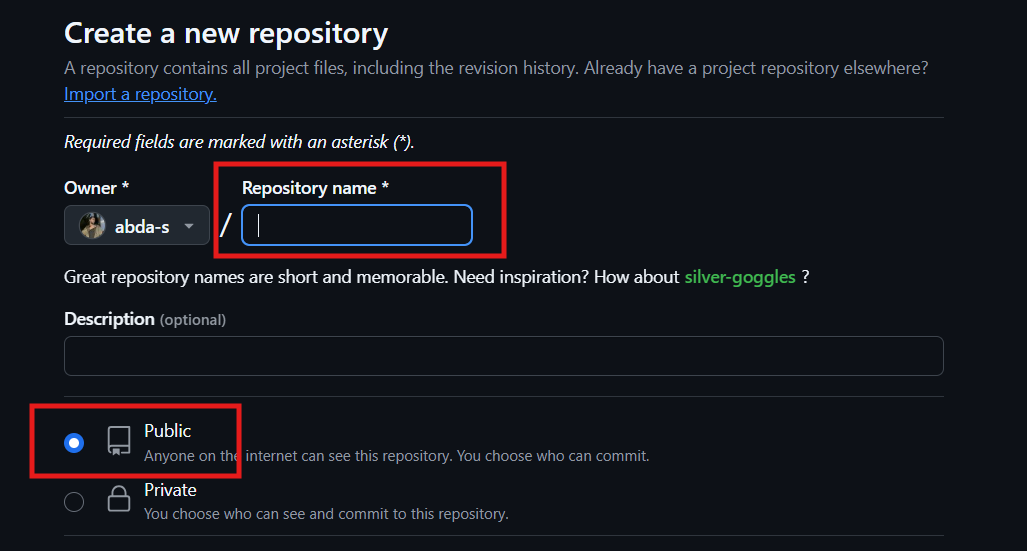
Click Create repository.

Step 2: Push Your Code to GitHub
- Add the remote origin for your repository:
git remote add origin https://github.com/username/salamehBlog.git- Build the website:
hugo- Add all files to the staging area:
git add .- Commit your changes:
git commit -m "Initial commit"- Push the code to GitHub:
git push -u origin main- Create a new branch for GitHub pages to deploy from
git subtree split --prefix public -b gh-pages-deploy
git push origin gh-pages-deploy:gh-pages --force
git branch -D gh-pages-deploy
After completing these steps, your Hugo website will be successfully uploaded to GitHub and ready for deployment.
Deployment
Navigate to the Settings of your GitHub repository.
Select Pages from the left-hand menu.
Choose the
gh-pagesbranch and set your custom domain.
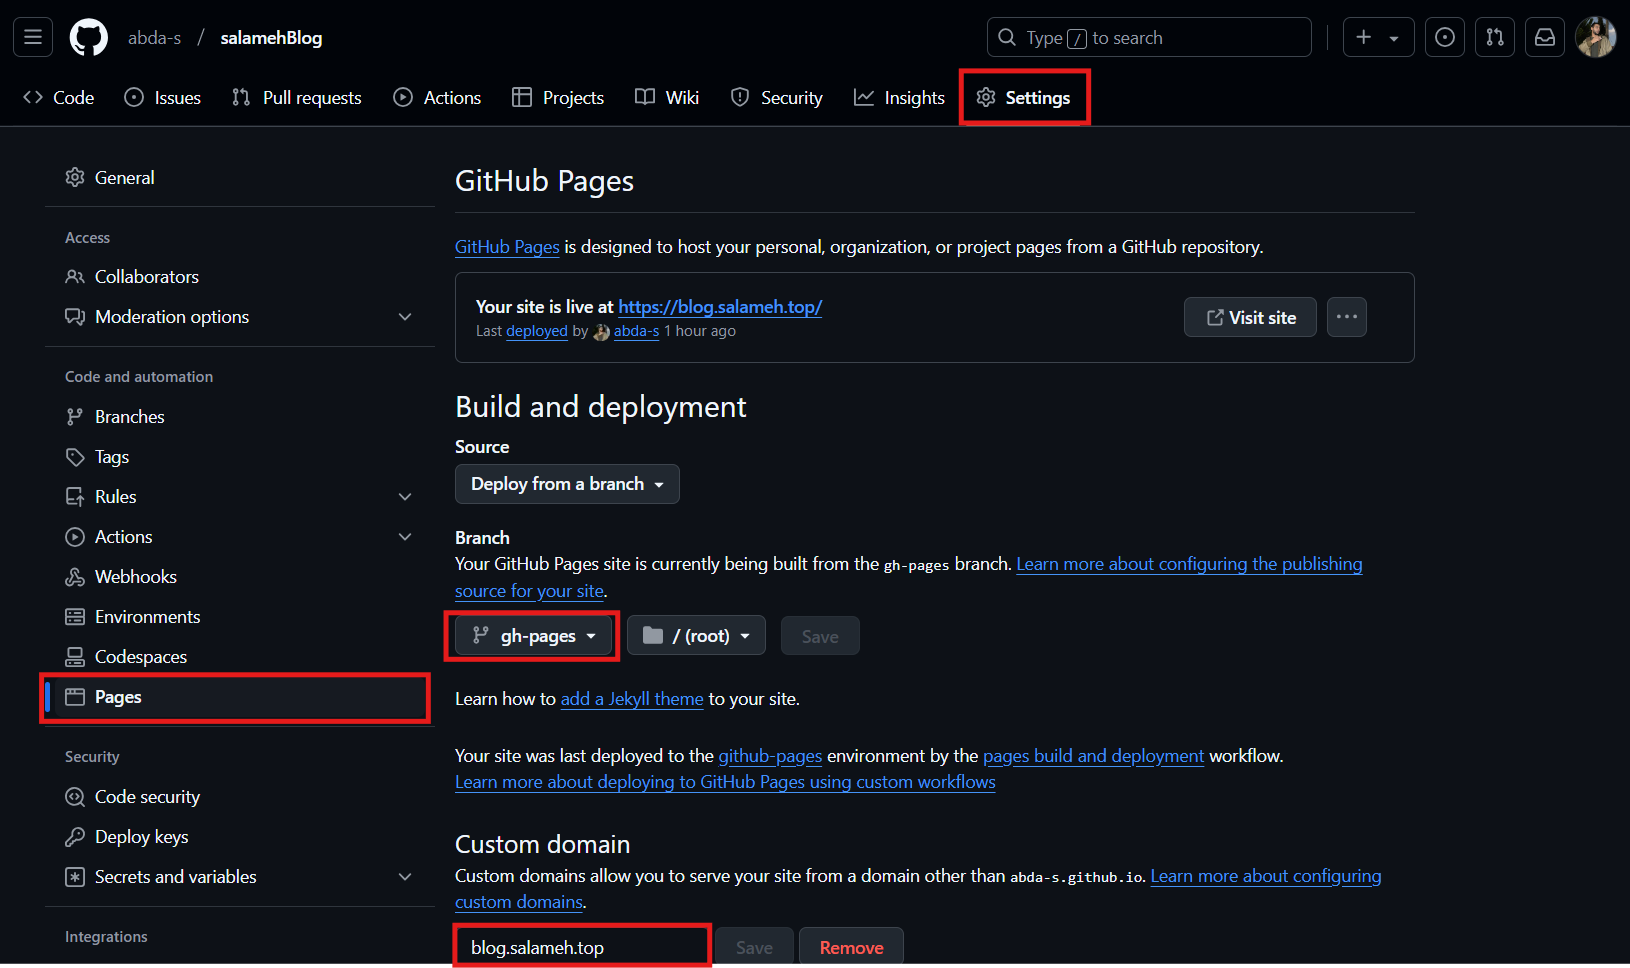
In the
publicfolder of your Hugo project, create a file namedCNAME.
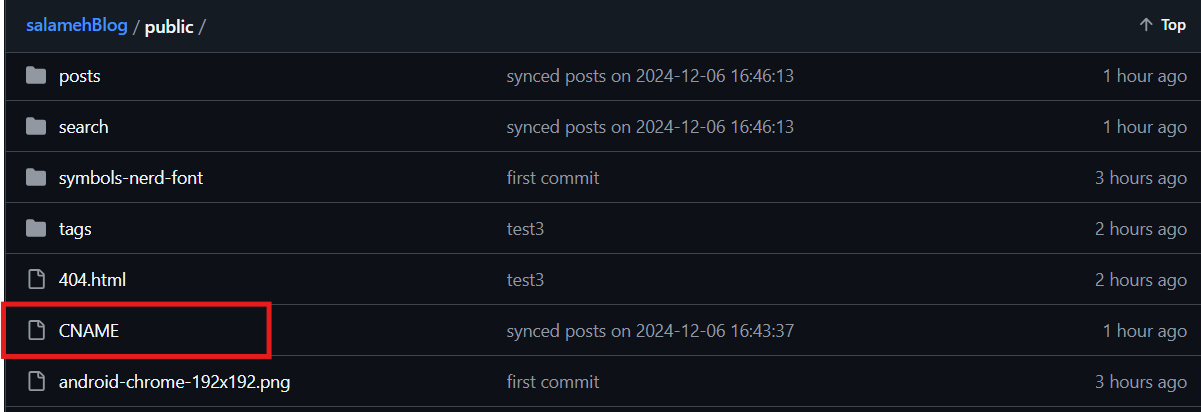
Add your custom domain (e.g.,
blog.salameh.top) inside theCNAMEfile.
Automation Script
Now that everything is set up, we need to address the challenge of running multiple commands each time we want to publish a post. This process is prone to human error and can be cumbersome. To streamline this, we’ll create a PowerShell script that automates the entire workflow.
- Create the Script
In the root folder of your blog, create a new file namedupdateblog.ps1and paste the following code into it:
# PowerShell Script for Windows

# Set variables for Obsidian to Hugo copy
$sourcePath = "C:\Users\3adas\OneDrive\Notes\posts"
$destinationPath = "C:\Users\3adas\Documents\salamehBlog\content\posts"

# Set Github repo
$myrepo = "reponame"

# Set error handling
$ErrorActionPreference = "Stop"
Set-StrictMode -Version Latest

# Change to the script's directory
$ScriptDir = Split-Path -Parent $MyInvocation.MyCommand.Definition
Set-Location $ScriptDir

# Check for required commands
$requiredCommands = @('git', 'hugo')

# Check for Python command (python or python3)
if (Get-Command 'python' -ErrorAction SilentlyContinue) {
    $pythonCommand = 'python'
} elseif (Get-Command 'python3' -ErrorAction SilentlyContinue) {
    $pythonCommand = 'python3'
} else {
    Write-Error "Python is not installed or not in PATH."
    exit 1
}

foreach ($cmd in $requiredCommands) {
    if (-not (Get-Command $cmd -ErrorAction SilentlyContinue)) {
        Write-Error "$cmd is not installed or not in PATH."
        exit 1
    }
}

# Step 1: Check if Git is initialized, and initialize if necessary
if (-not (Test-Path ".git")) {
    Write-Host "Initializing Git repository..."
    git init
    git remote add origin $myrepo
} else {
    Write-Host "Git repository already initialized."
    $remotes = git remote
    if (-not ($remotes -contains 'origin')) {
        Write-Host "Adding remote origin..."
        git remote add origin $myrepo
    }
}

# Step 2: Sync posts from Obsidian to Hugo content folder using Robocopy
Write-Host "Syncing posts from Obsidian..."

if (-not (Test-Path $sourcePath)) {
    Write-Error "Source path does not exist: $sourcePath"
    exit 1
}

if (-not (Test-Path $destinationPath)) {
    Write-Error "Destination path does not exist: $destinationPath"
    exit 1
}

# Use Robocopy to mirror the directories
$robocopyOptions = @('/MIR', '/Z', '/W:5', '/R:3')
$robocopyResult = robocopy $sourcePath $destinationPath @robocopyOptions

if ($LASTEXITCODE -ge 8) {
    Write-Error "Robocopy failed with exit code $LASTEXITCODE"
    exit 1
}

# Step 3: Process Markdown files with Python script to handle image links
Write-Host "Processing image links in Markdown files..."
if (-not (Test-Path "images.py")) {
    Write-Error "Python script images.py not found."
    exit 1
}

# Execute the Python script
try {
    & $pythonCommand images.py
} catch {
    Write-Error "Failed to process image links."
    exit 1
}

# Step 4: Build the Hugo site
Write-Host "Building the Hugo site..."
try {
    hugo
} catch {
    Write-Error "Hugo build failed."
    exit 1
}

# Step 5: Add changes to Git, including handling deletions
Write-Host "Staging changes for Git..."

# Detect changes and include deletions
$gitStatus = git status --porcelain

if (-not $gitStatus) {
    Write-Host "No changes to stage."
} else {
    # Stage all changes, including deletions
    Write-Host "Staging all changes, including deletions..."
    git add --all
}


# Step 6: Commit changes with a dynamic message
$commitMessage = "synced posts on $(Get-Date -Format 'yyyy-MM-dd HH:mm:ss')"
$hasStagedChanges = (git diff --cached --name-only) -ne ""
if (-not $hasStagedChanges) {
    Write-Host "No changes to commit."
} else {
    Write-Host "Committing changes..."
    git commit -m "$commitMessage"
}

# Step 7: Push all changes to the main branch
Write-Host "Deploying to GitHub Master..."
try {
    git push origin master
} catch {
    Write-Error "Failed to push to Master branch."
    exit 1
}

# Step 8: Push the public folder to the gh-pages branch using subtree split and force push
Write-Host "Deploying to GitHub pages..."

# Check if the temporary branch exists and delete it
$branchExists = git branch --list "gh-pages-deploy"
if ($branchExists) {
    git branch -D gh-pages-deploy
}

# Perform subtree split
try {
    git subtree split --prefix public -b gh-pages-deploy
} catch {
    Write-Error "Subtree split failed."
    exit 1
}

# Push to gh-pages branch with force
try {
    git push origin gh-pages-deploy:gh-pages --force
} catch {
    Write-Error "Failed to push to hostinger branch."
    git branch -D gh-pages-deploy
    exit 1
}

# Delete the temporary branch
git branch -D gh-pages-deploy

Write-Host "All done! Site synced, processed, committed, built, and deployed."
- Run the Script
Each time you want to sync or upload a new post, simply execute the script:
.\updateblog.ps1